How to Set up an Automated Weekly Email Newsletter

 ContentPowered.com
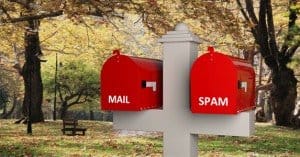
Newsletters are a great way to keep your audience engaged. They’re also one of the few traffic sources you can have that aren’t reliant on an outside force. With organic traffic, you have to worry about Google changing their algorithm or cutting you off for one reason or another. With paid traffic, you have to deal with ever-shifting costs, competition within keywords, and even the potential collapse of a social network. With a mailing list, your links are delivered directly to the inboxes of the people who already professed to be interested in your content, and thus will be a direct traffic source. All you have to do is work to maintain user engagement and expand your subscriber base.
All of that is for another post, however. First, you need to set up your newsletter.
Step 1: Determine Frequency
The first thing you want to do is figure out how often you want to be sending emails to your mailing list.
You have a few options here. A lot of mailing lists these days fall into one of four categories.
- The daily digest. Companies that send out emails this frequently are generally concerned with ongoing issues from day to day. You see this a lot with political mailing lists and the lists for activists who want to keep audiences informed. It can also be a seasonal thing, with Advent Calendar deal messages falling into this category. Amazon will also often send daily emails if you’re a frequent browser of their site, including products you have recently viewed.
- The weekly roundup. This is the most typical list type for a blog. It’s frequent enough that you don’t need to worry about losing readers due to how rarely they open messages. On the other hand, it’s not so frequent that you have to struggle to find content to publish. Often, it will include your blog posts for the week, maybe a special sale in your store, and some exclusive content only subscribers can see.
- The monthly CTA. This is a much rarer form of mailing list message, and it’s used for two reasons. Either you’ve found that your users don’t respond very well to more frequent messages, or you don’t have much to say. I see this used more on blogs that only publish 2-4 blog posts per week. It can also be used as a supplement to a billing cycle, as a reminder that a bill is due with some added value beyond just the bill itself.
- The occasional message. This is the method many people use when they’re convinced that they don’t have enough to say to make a newsletter worth it. It’s generally used by authors, smaller personal sites, and new product notifications or developments for people who preorder something.
For the purposes of this post, we’re going to assume you’re publishing blog posts frequently enough to warrant a weekly roundup newsletter, but not so often that you can benefit from daily messages. You won’t be flooding your readers with messages they won’t open, which is good, because too many ignored messages mean your newsletters will start being marked as spam. However, do make note that you can always change the frequency of your newsletter whenever you want. If you find that people respond to daily messages more than to weekly messages, by all means, upgrade.
Step 2: Determine Content
Once you know about how often your newsletter is going to be sent out, you can start building a content template for it. A template is important because it will give you an idea of how many pieces of content and of what types those pieces should be.
For example, say you’re sending out a weekly message but you only write three blog posts per week. Do you want to share all three of them as a content digest? Or would you prefer something a little more curated, and share only one of them as your best piece of content that week?
Every newsletter should have the following elements in it, however you decide to design it.
- Links to content on your website. Think of this like the meta title and description that Google would publish, except written more robustly than Google’s limitations. You have more space and can give more of a summary of your post without being truncated.
- Links to content on other websites. If you’re doing a frequent email newsletter but you don’t have a ton of content on your own site, it can be a struggle to figure out what to post. In these cases, curating content from partners can be a great help. It also gives you a position in your newsletter you can use for promoted posts, to sell your traffic so to speak.
- Links to your social media profiles. No newsletter is complete without a way for users to engage with you beyond their inboxes. Getting them to follow you on social media with a brief CTA and the image link of the social network is highly valuable.
- Content exclusive to the mailing list for added value. This can be anything from a small tips and tricks section to links to exclusive coupons and deals, or even direct downloads for content that can’t be found elsewhere. Distributing a new ebook? Send out a link to your mailing list first.
- A dedicated call to action. This doesn’t have to be more than a single line, but it can be as much of the focus of your newsletter as you want it to be. Some newsletters will have little more than a “check out our new content” call to action, while others will be almost entirely focused on a new product launch, to the exclusion of content links or anything else.
You can skip the curated content links if you so desire. I find that they can be good filler and a decent secondary form of monetization in some cases, but I also understand that many brands don’t want to dilute their own content with links to other brands.
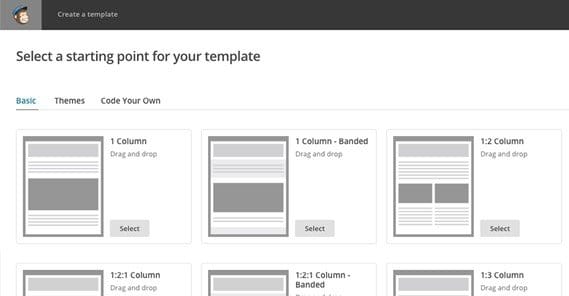
As for the templates, your design can range from plain text with a few hyperlinks all the way up to fancy HTML designs that essentially work as a small website hosted in the email itself. There are dozens of templates you can find online so feel free to take inspiration from them and make your own, or just use an existing template and customize it to fit your brand.
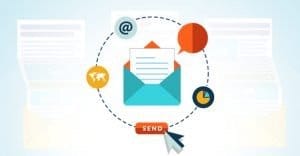
Once you have all of these elements in place, the actual copywriting of the newsletter itself should be easy. Include the time-sensitive information you need to include, add in your links and descriptions, add an image or two if the template has space for it, and you’re good to go.
Step 3: Set Up Automation
Next, it’s time for the actual automation part of things. For this article, I’m going to assume you’re using MailChimp, because it’s a great program. You can click the sign up button in the upper corner to get started if you don’t already have MailChimp maintaining your mailing lists for you.
 How to Convert an Email List from Single to Double Opt In If you have a single opt-in email…

One reason I suggest MailChimp to brands looking to start a mailing list is because it starts off free. The free version is up to 2,000 mailing list subscribers and up to 12,000 sent emails per month. If you need to surpass either of those limits, you will need to pay for a plan, though they start out cheap. It’s essentially $5 per 500 subscribers after 2,000, starting at $20 per month. Costs scale as your needs scale, which should hopefully be as your profits scale.
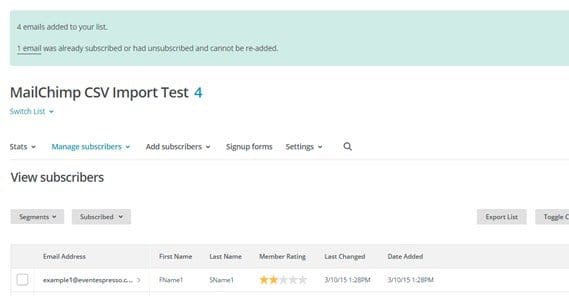
If you haven’t used MailChimp before, but you do have a mailing list, you will need to import your list. To do so, simply export it from whatever software you’re currently using, so you have a CSV file with all of the relevant data. You can also use a tab delimited file if you have that instead. Those can be pasted into a spreadsheet and saved as a CSV for easiest imports. In MailChimp, go to list management and click import subscribers. Choose to find it from file and import your CSV file. From there, you can set the categories for each column of data to match what you have, and MailChimp will automatically create a list out of those subscribers. For the process in detail, and a video explaining it, go here.
Now here’s where things get a little tricky. See, automation workflows are only available to pro-tier subscribers on MailChimp, which means you have to be paying rather than using the free version of the service. You can still create and send your newsletters individually with the free version, but you will not be able to automate them to trigger every week or month.
If you have the paid version, what you’re looking for is a custom workflow. Several of the dozens of other workflows might work, but will have extraneous fields and triggers you don’t need to care about. With a custom workflow, you can choose an indefinite string of weekly or monthly messages to be sent out, based on a variety of different inputs. You can even have the date vary depending on the day of the week or of the month that the user subscribed initially.
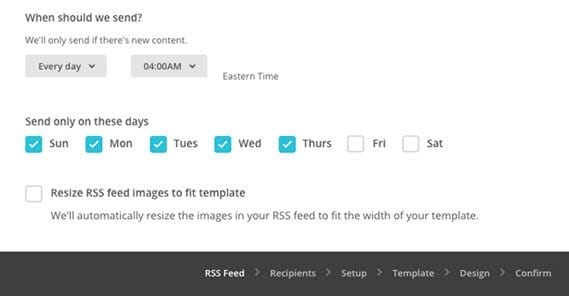
There are a lot of tricky details to setting up this kind of automation, so I’ll let you handle it yourself. You can read about adding a workflow here, and see an example of the process with an RSS-to-Email workflow here.
Step 4: Monitor and Improve
MailChimp makes it easy to view the open and click metrics for your messages when you send them. You’re able to see how large your audience is, how many of those people saw the message, how many of them opened it, and how many of them clicked links inside it. It’s a surprisingly robust amount of analytics for the inside of an email.
Based on these metrics, you’ll want to start running split tests. This is another type of campaign you can create in MailChimp, which allows you to run two variations of a message to different sub-groups in your mailing list.
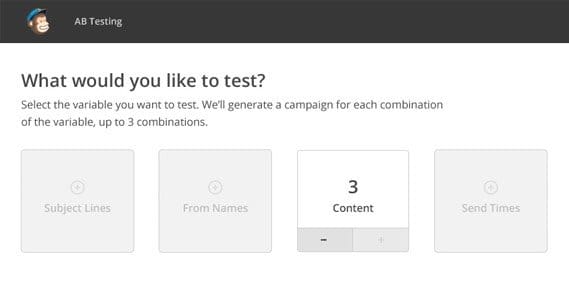
If you have 1,500 subscribers, 750 of them will see one version and 750 will see another. You can then see how various aspects of your message affect open rates and click rates.
- Does the HTML layout do better, or does plaintext?
- Do shorter messages do better, or longer messages?
- Do people prefer one explicit CTA or several smaller CTAs?
- Do people like it when you link to other sites, or just your own?
These are the sorts of questions you can answer with split tests.
The trick to successful split testing is to make sure you have roughly equal exposure to both sides of the test, and to only test one element at once. If you change three things about your email and one side does better than the other, that’s great, but you have no idea which of the three elements you changed had that effect. When you test one at a time, you can see what effect that single test has, and adjust your marketing moving forward.
The other thing you may want to test, which you can’t do with split testing, is email frequency. How often do you send your email messages? We assumed once a week was a good place to start, but maybe sending them when you post a new blog post is better, in which case you can use that RSS-to-email workflow from above. Alternatively, you could post less often, but you risk losing some users who like making you part of their weekly routine. Of course, if you’re losing subscribers due to how frequently you post, posting less often is a good idea.
MailChimp has a ton of features to make all of this testing, and the associated analytics, much easier for the average business. I highly recommend digging into their knowledge base and exploring their dashboard to see everything you can do.

Thumbs up!!. Its a nice help to email marketers like me to ease out my email marketing campaigns. Thanks by the way